Understanding the Exposure Triangle | Digital Photography Education
Aperture. Shutter speed. ISO. The holy trinity of photography—the exposure triangle.
But what are these, and how do you make them work together?
First, you have to understand that photography is literally “writing with light.” As I teach the students in my ELA class every year, “photo” means light and “graph” means write. Aperture, shutter speed, and ISO all have to do with controlling the light you allow into your camera so that you can expose, or make clear, your image. But there are other effects that you can achieve by controlling aperture, shutter speed, and ISO that aren’t light related—bokeh, blur, and grain.
Aperture
I remember my Uncle Howard, an amazing photographer himself, trying to explain aperture to me when I was in high school. And it made zero sense to me. It wasn’t until I took an Intro to DSLR Photography course and began to SEE what he had tried to explain to me years before that it finally started to make sense. When I connected the way a lens works to the way our eyes work that I began to understand aperture!
You know how your pupils dilate based on the amount of light they’re exposed to? They get bigger when it’s darker and smaller when it’s brighter. That’s exactly what a lens does when you control the aperture. When you want to let more light into your camera, you open up the aperture/f-stop. An effect of this is that the things that you aren’t focusing on become fuzzy. That’s called “bokeh.” The same thing happens with your eyes! Try opening them wide and letting in more light—everything else other than what you’re focusing on becomes fuzzy! When you already have plenty of light available, you can close down your aperture/f-stop. An effect of this is that there is less bokeh and more clarity in your photo overall. This is the same effect your eyes have on your vision when you squint them. It’s why we squint when we’re trying to see things that aren’t clear!
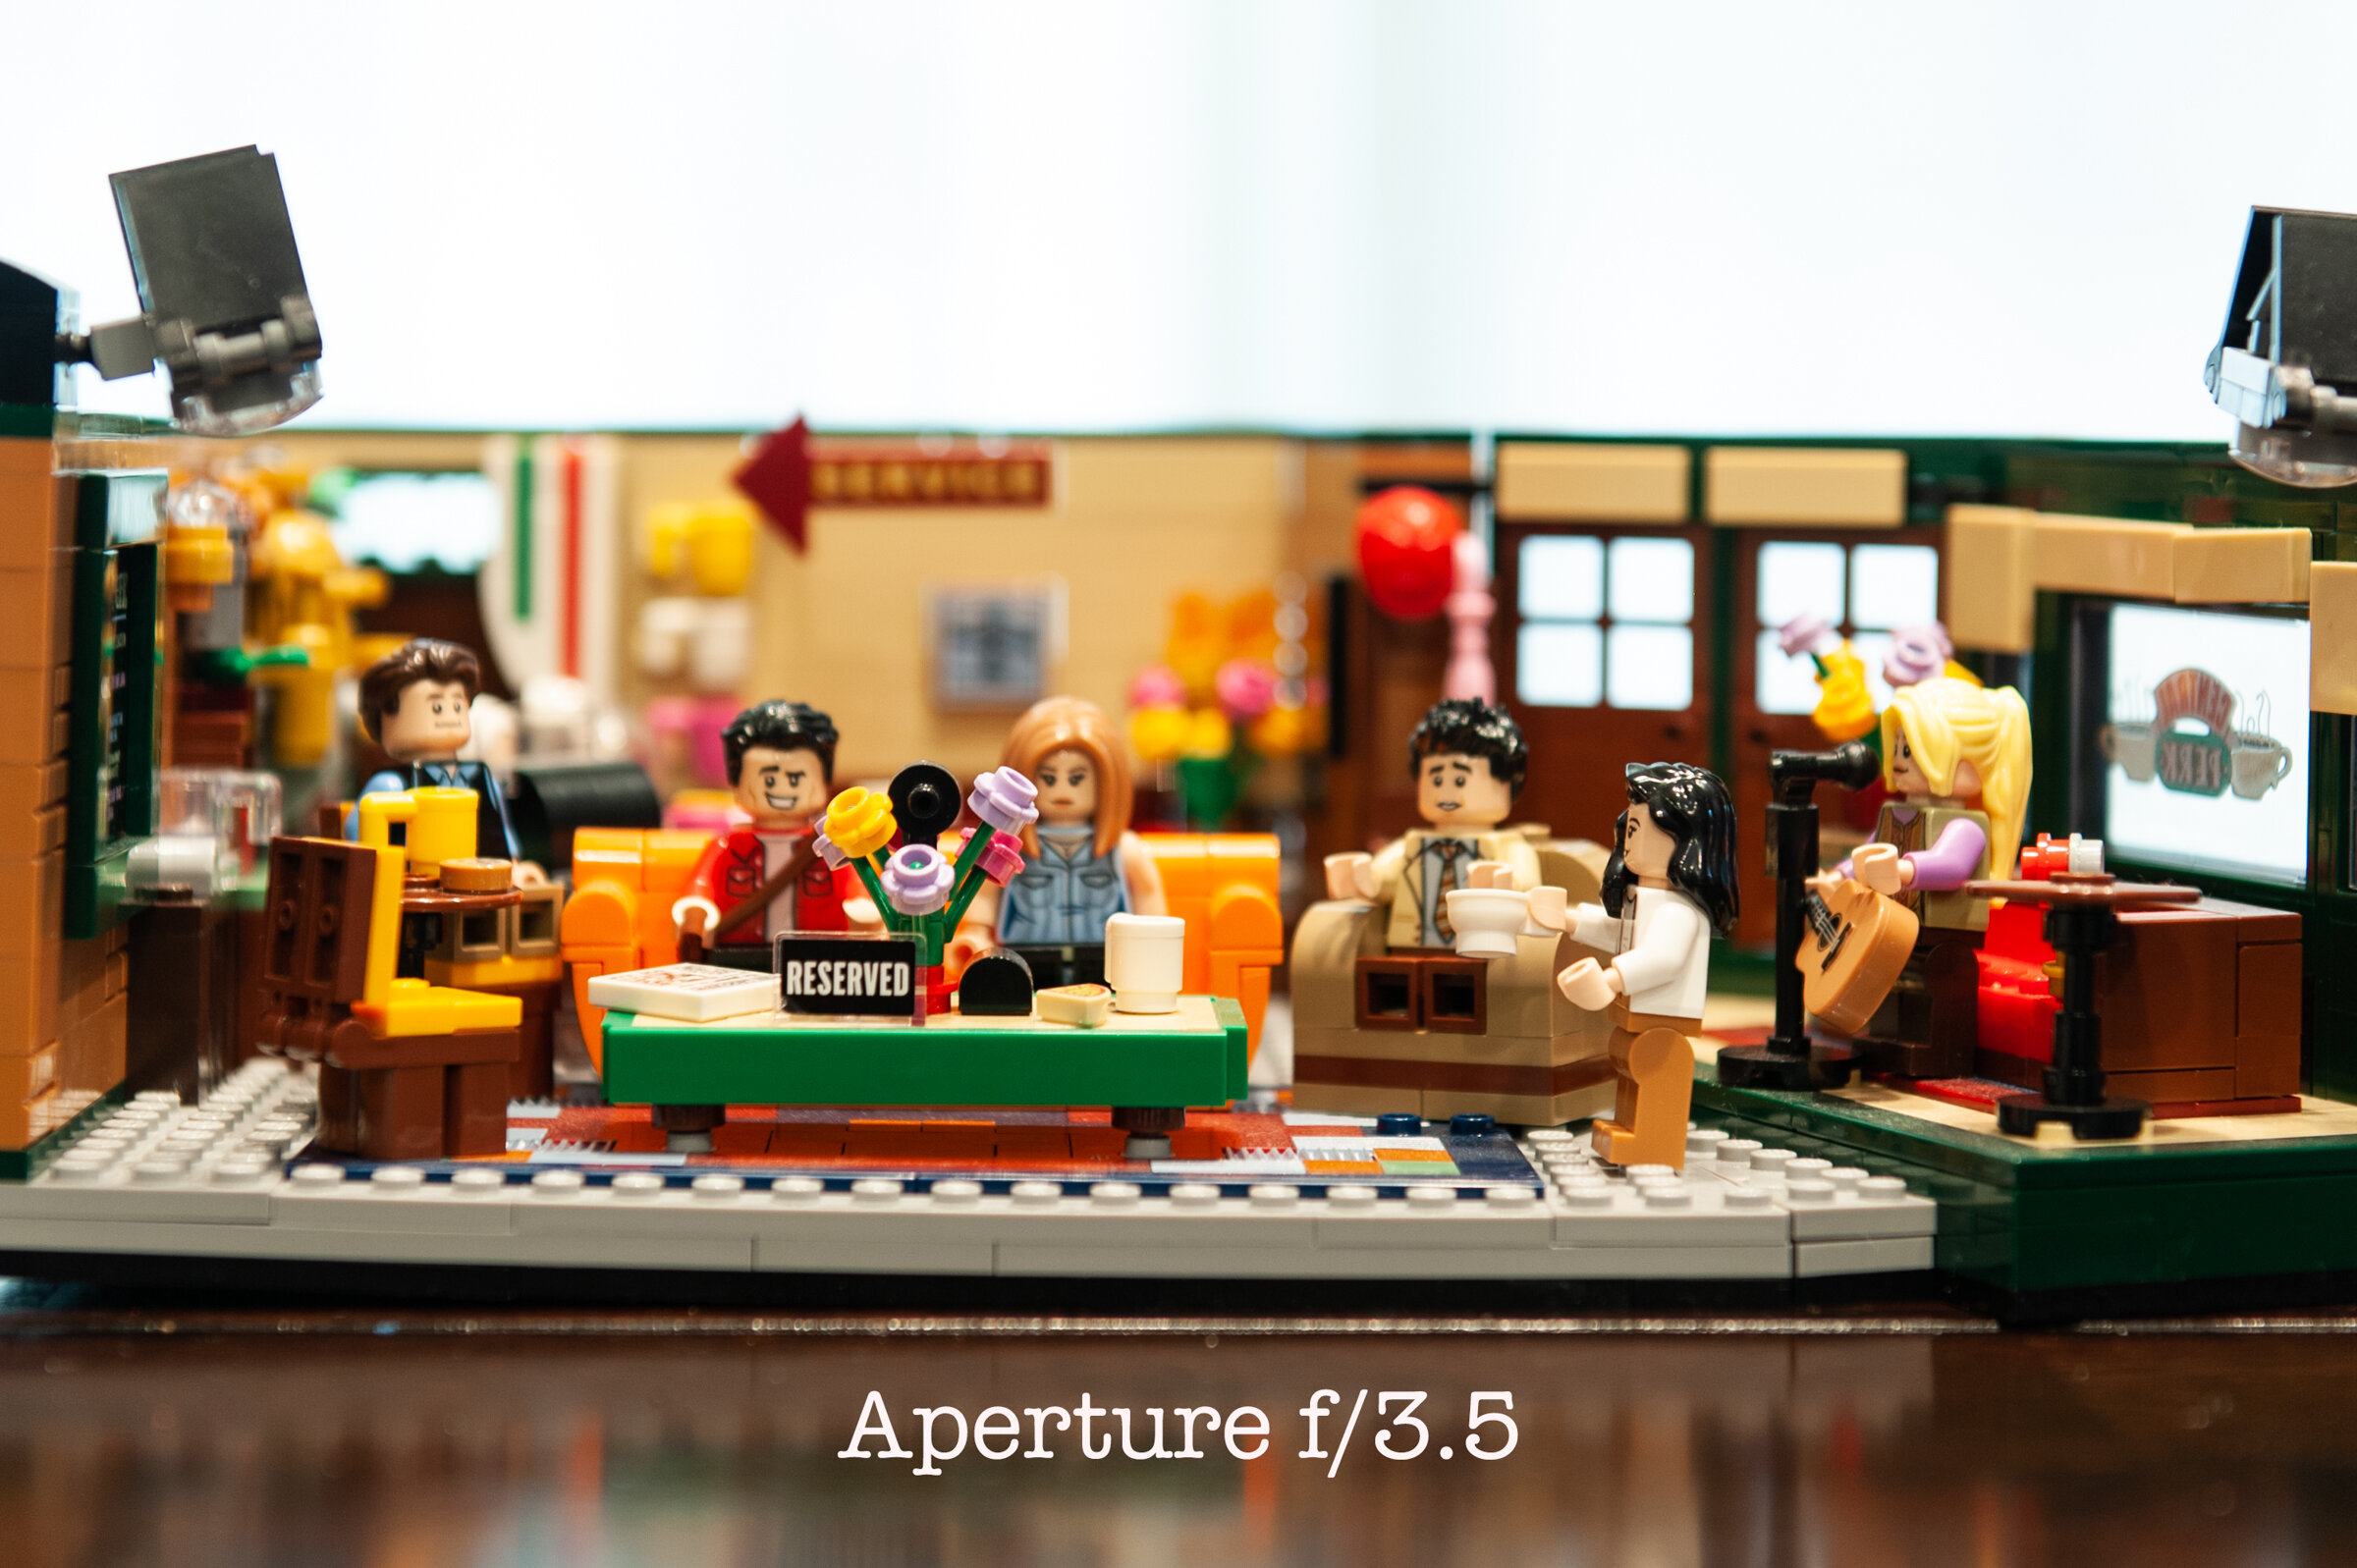
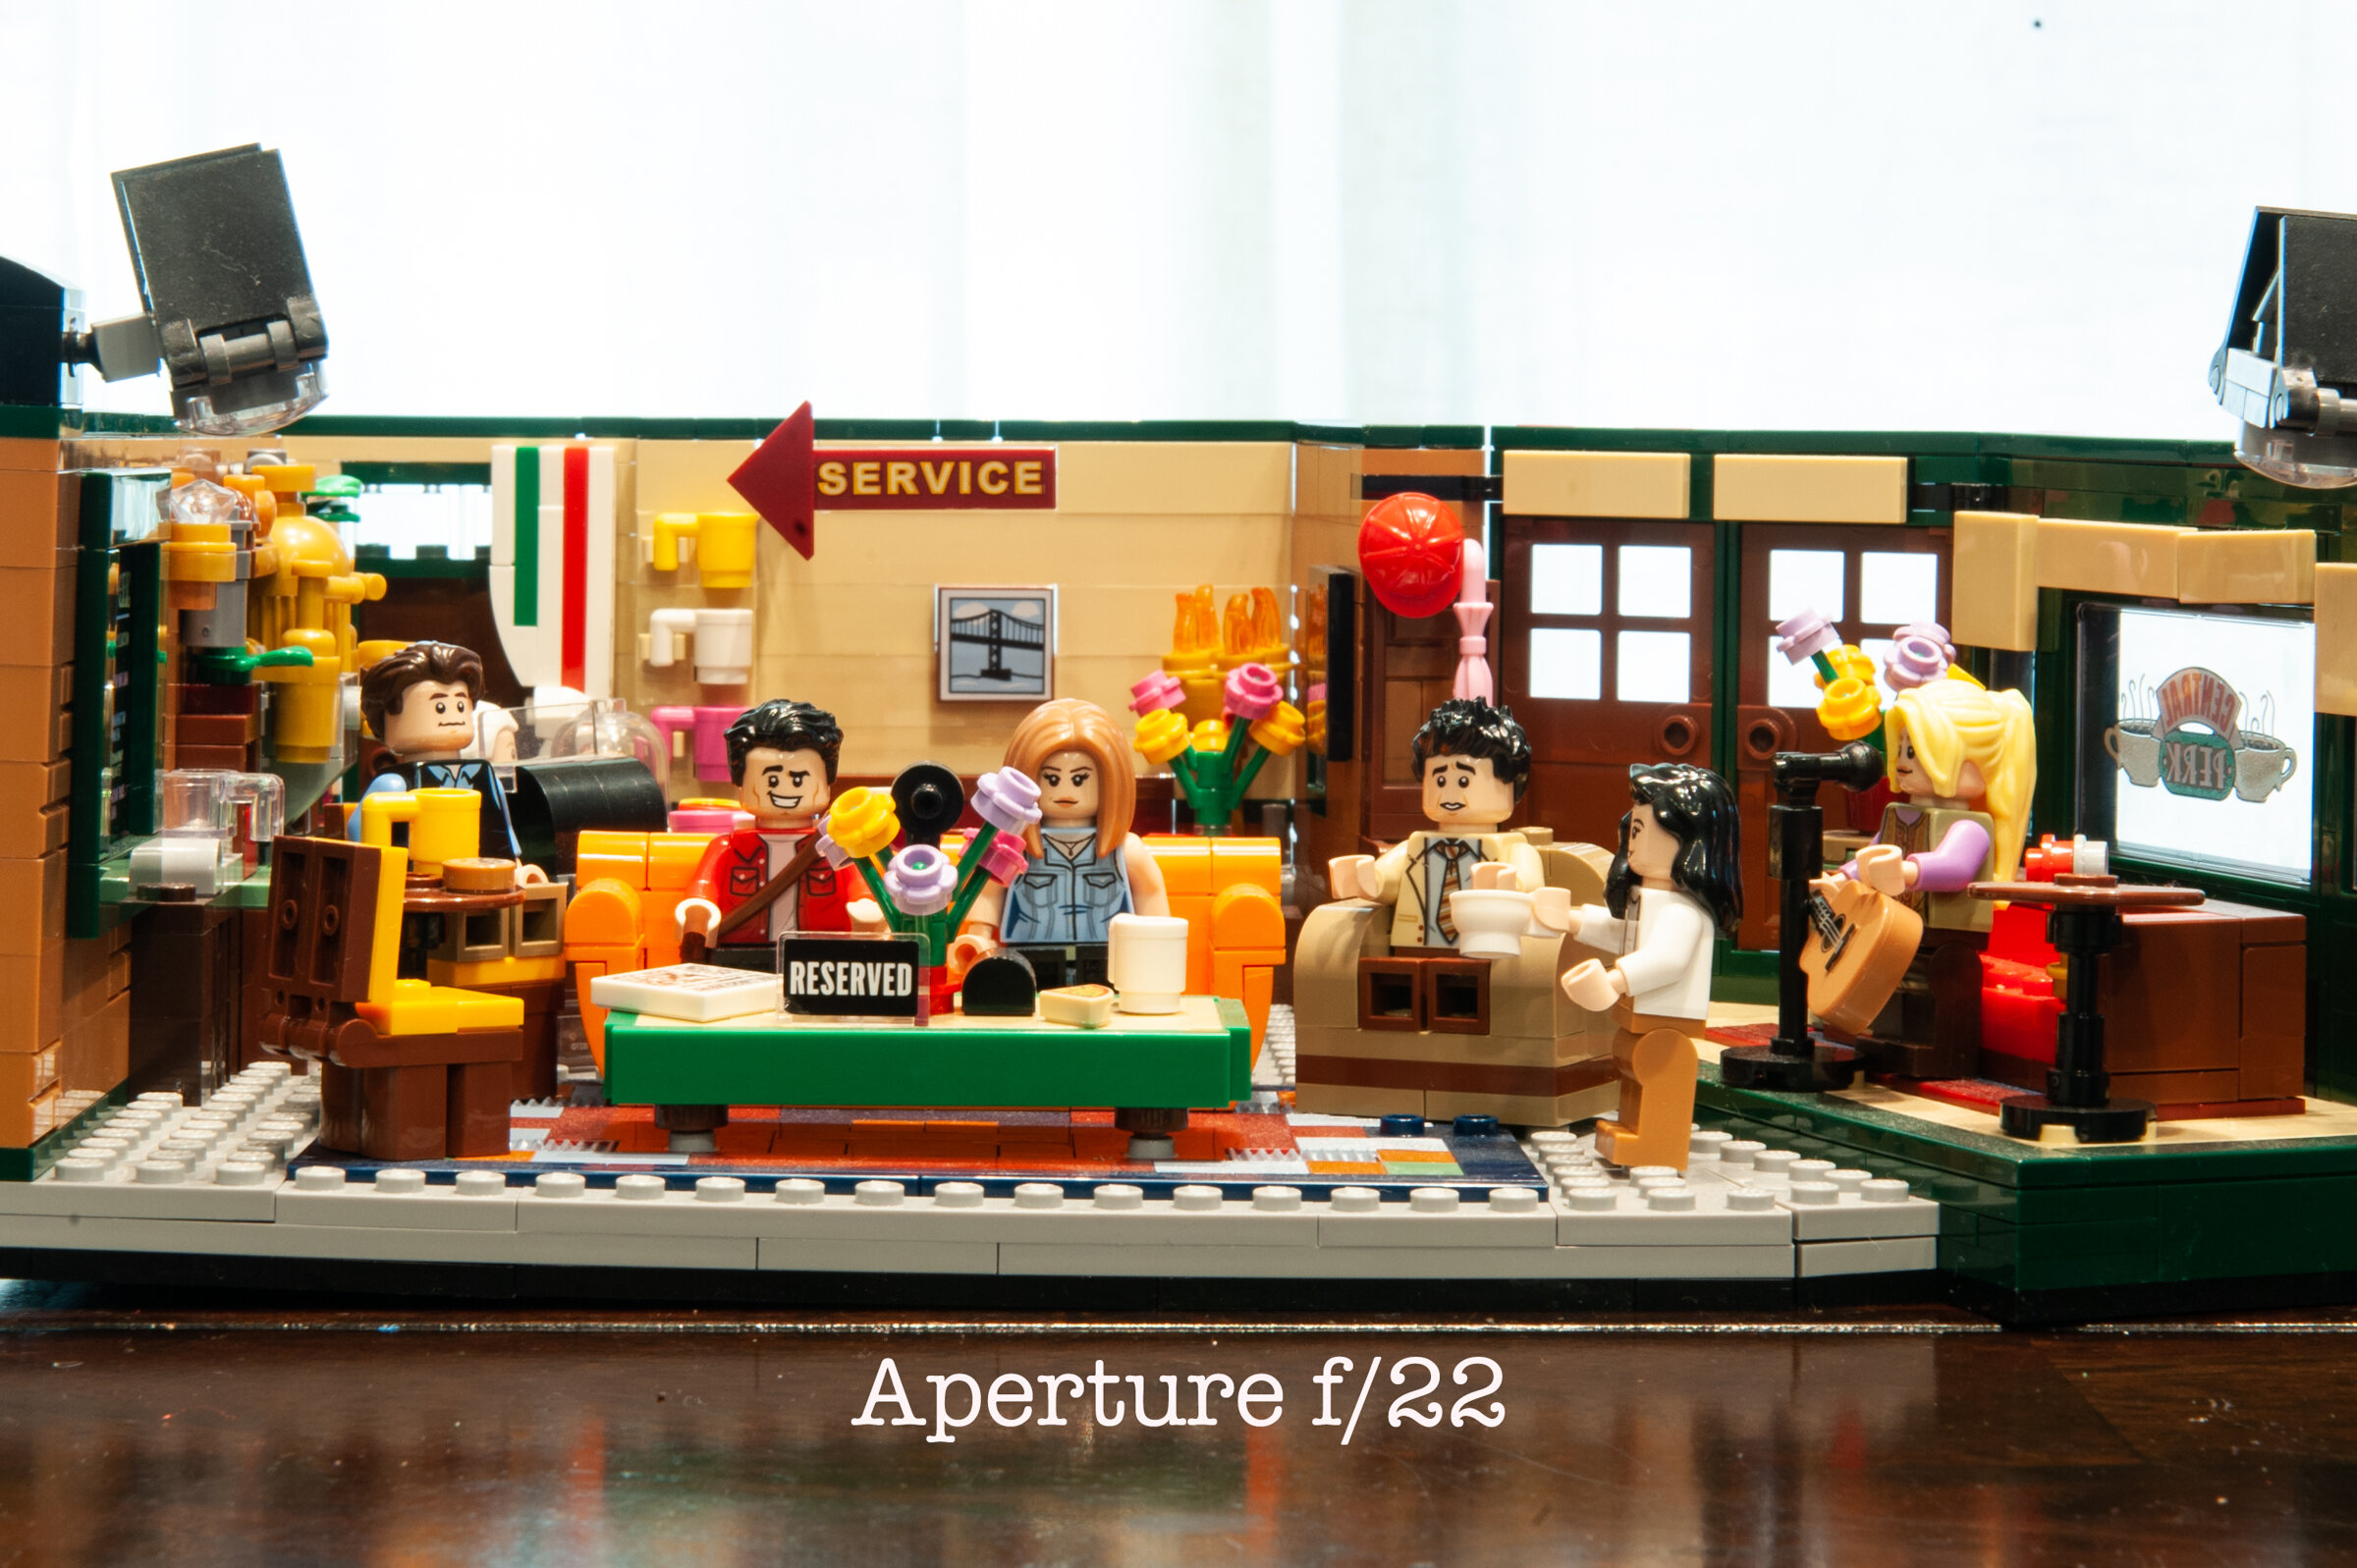
F-stop numbers correspond with how open your lens is, and at first, the numbers take a bit getting used to because they seem backwards (or at least they did for me when I was a beginner)! The wider open your aperture/f-stop, the lower the number (f/1.4, 2.0. 2.8, 3.5). The more closed down/smaller your aperture/f-stop, the higher the number (f/16, 20, 23, 26).
In the photos below, pay close attention to the clarity of the entire photo as the f-stop/aperture numbers increase. At the lower f-stop numbers, the only real character you can see clearly is Monica (the dark-haired female Lego character on the right). But as the numbers increase, the other characters in the scene become clearer. You can really see this illustrated by looking at the “service” arrow in the background of the scene, which becomes more and more clear as the f-stop numbers increase. (All photos taken with a Nikon d700 at 60mm and a consistent ISO of 200. I used a tripod to maintain consistency and so that as I closed down my aperture, I could slow down my shutter speed to accommodate for less light.)


Shutter Speed
Shutter speed has to do with the speed at which your shutter opens and closes—how fast your camera “clicks.” The faster the shutter speed, the quicker your image is captured, but when your shutter speed is very fast, there is less light let into your camera to expose the image. (The low light can be accommodated by opening up your aperture or raising your ISO, which will discussed below.) The slower your shutter speed, the more light is let into your camera, but you risk capturing more blur of anything that is moving in your photo. To achieve the soft, cottony look of water flowing over rocks or car trails at night, you have to slow down your shutter speed (under 50) and use a tripod to avoid camera shake. If you want a “stop motion” type image where your subject is frozen perfectly in time (like a basketball player dunking a basketball, a dog catching a frisbee, or a group of friends trying to create a jumping photo), your shutter speed should be fast (over 250).
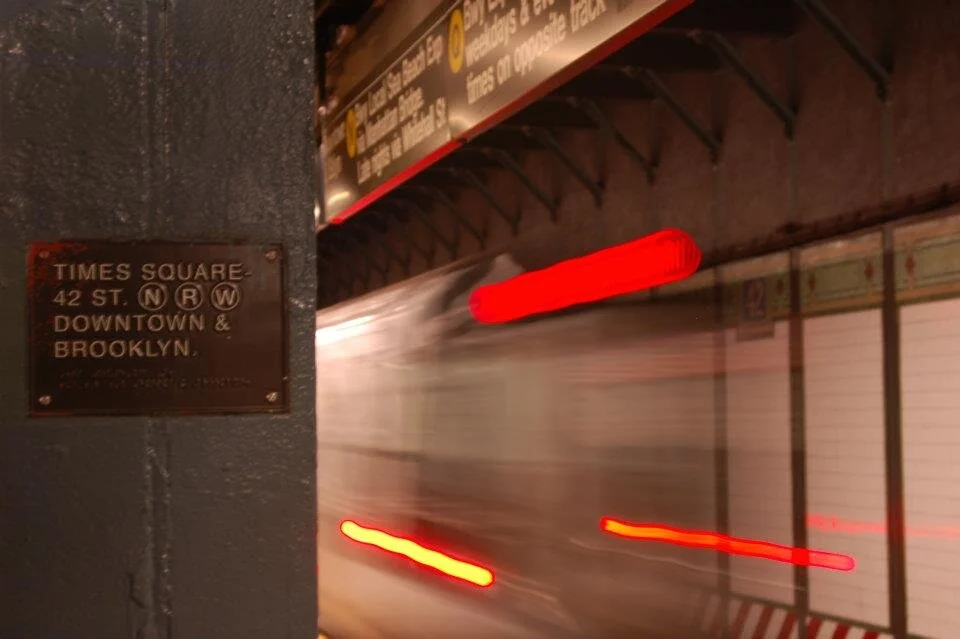
Playing with shutter speed is really fun! One of the first experiences I had experimenting with shutter speed was photographing car trails at dusk. I set up my tripod so that my camera was stable and photographed cars driving by using different shutter speeds until I captured the perfect image. I took the image to the right soon after on a short trip my husband and I took to New York City. I didn’t even have a tripod, but I held my camera as steady as possible and slowed down my shutter speed as a subway flew by so that I could capture its light trails.
Another fun trick you can accomplish by slowing down your shutter speed is “ghosting.” I created this image with some of my students on a field trip to Winthrop University, where we visited the spooky 4th floor of Tillman Hall, which is rumored to be haunted. We thought it would be a fun opportunity to create some “ghost” images, so I set up my camera on my tripod, slowed down my shutter speed, and then asked the students to move around Jackson, who stood perfectly still so that he would be clear. What resulted was an image that seems to show a bunch of ghosts tormenting him!
ISO
ISO is the most mysterious side of the exposure triangle. It stands for “International Organization of Standardization” (Why it’s ISO instead of IOS is beyond me!) It originally had to do with film sensitivity but was adapted into digital photography, because after all, digital photography should mimic film photography! It’s basically how sensitive your camera’s sensor is to light. The lower your ISO (usually starting at ISO 100), the less light is let into your camera. Lower ISO settings are useful when there is plenty of light already available. The higher the ISO (some cameras go well above ISO 6400!), the more sensitive your exposure is to light, but there is a side effect--”grain” or “noise.” Grain/noise is like the noise that used to show up on televisions when a channel went off the air—that fuzzy black and white “shhhhh” screen. (Nowadays, it’s just plain blue!) Pictures taken at a high ISO show more of this fuzziness. It’s not that your image is out of focus—it’s just “grainy” or “noisy.” Higher ISOs are useful in low light situations or when you are trying to achieve a more film-like, grainy look. (I usually try to keep my ISO as low as possible to avoid grain/noise, but my preferred style is clear and crisp. Sometimes the more dark and moody photography style lends itself to having more grain.)
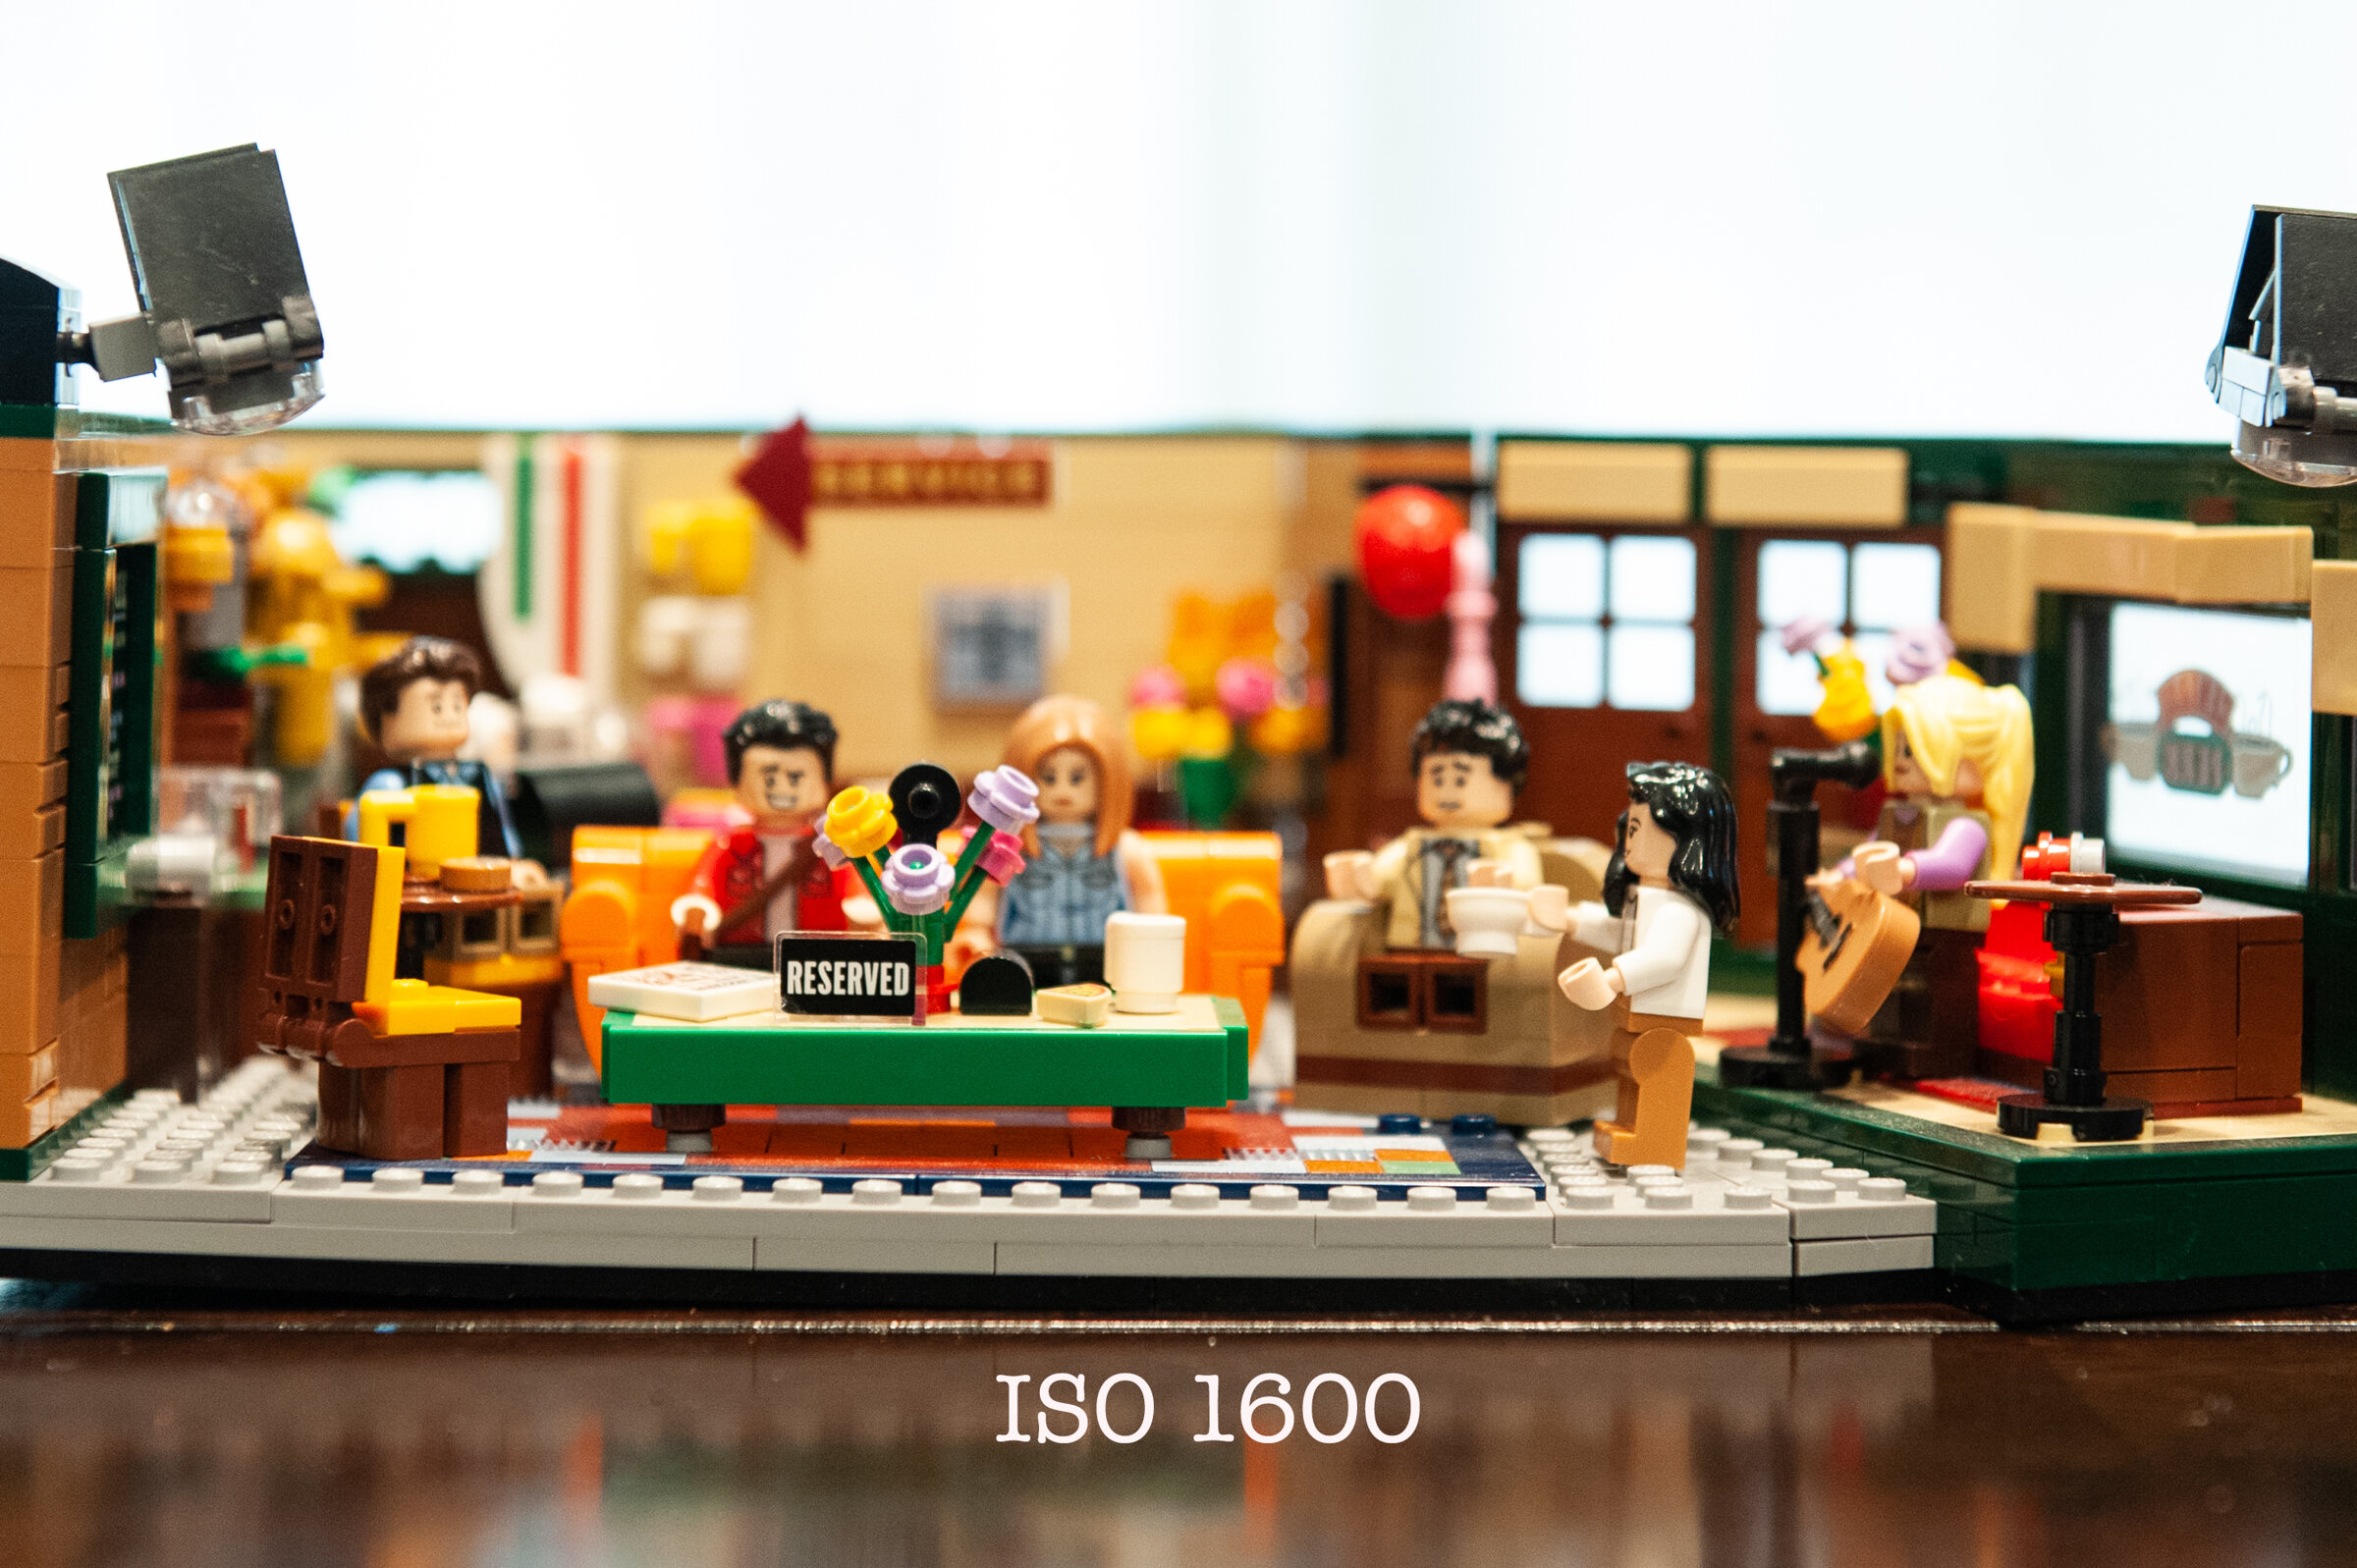
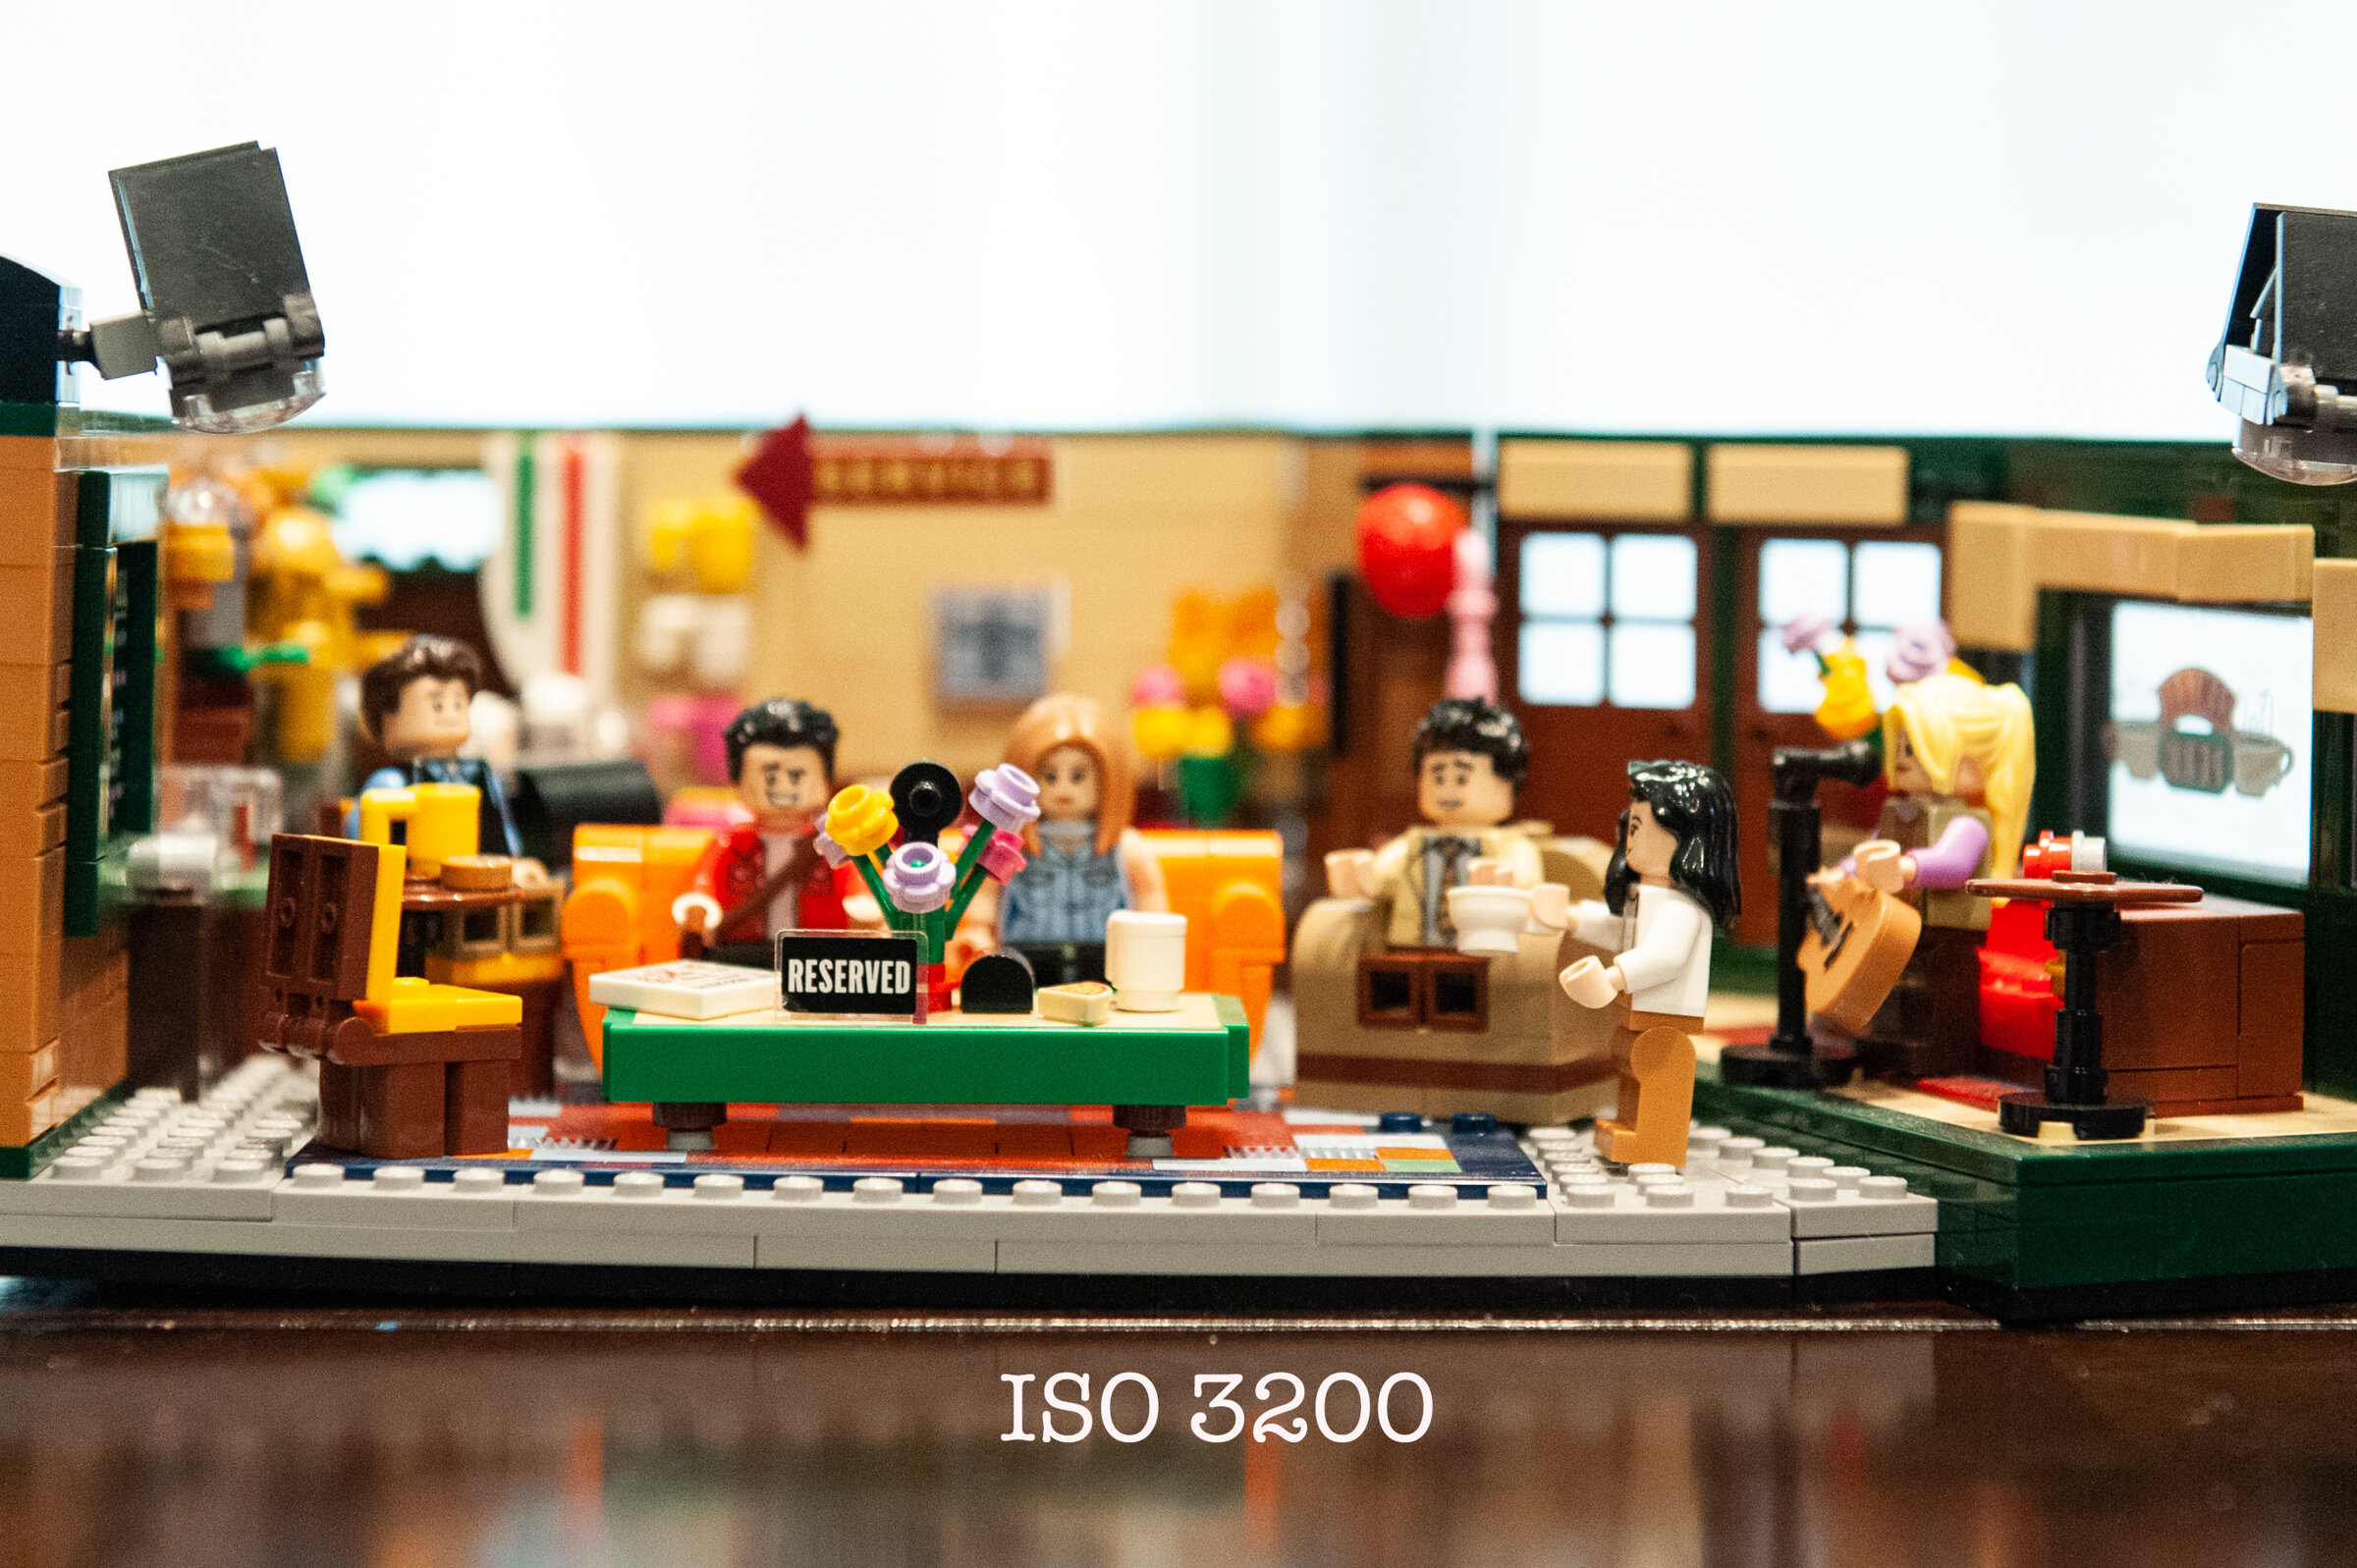
In the photos below, pay attention to how “fuzzy” the photos appear at higher ISOs (3200 and 6400) compared to lower ISOs (200 and 800). The grain/noise becomes even more evident the closer you zoom in and in the darker areas of the photographs. (All photos taken with a Nikon d700 at 60mm and aperture f/4.0 I used a tripod to maintain consistency and so that I could slow down my shutter speed at lower ISOs to accommodate for less light.)


Conclusion
Learning how to balance aperture, shutter speed, and ISO at the same time is tricky, so it’s easiest to practice with one at a time. Most DSLR cameras allow for “aperture priority” and “shutter priority” modes. In aperture priority mode, play around with opening up and closing down your f-stop, noticing how it changes the exposure and clarity/bokeh of your photos. In shutter priority, play around with slowing down and speeding up your shutter speed, noticing how it changes the exposure and blur of the subjects you’re photographing. ISO is usually something I adjust AFTER I set my shutter speed and aperture, only if there is still not enough light in the exposure, unless I am trying to create a noisy/grainy look.
Have fun, and let me know if there’s anything else I can add to this post to help things make more sense for you!
Blog Post updated in June, 2025.

Check out my YouTube video on this exact topic for more details on the exposure triangle!

Kimberly Cauble is a middle school teacher and wedding & portrait photographer who loves when her worlds collide. She is passionate about teaching and photography and started the after-school #OMSPhotoClub to teach photography to students in her middle school. And obviously, she is a huge Friends fan (and her kids love Legos).